Blog Archives
Fall Gardens
Gardening doesn’t stop til the snow flies!
There are so many things you can still plant and get a good harvest.
A second crop of beans or peas, many herbs will grow quickly in the time left. Things like kale will even survive frosts.
Get going and plan your fall garden today!

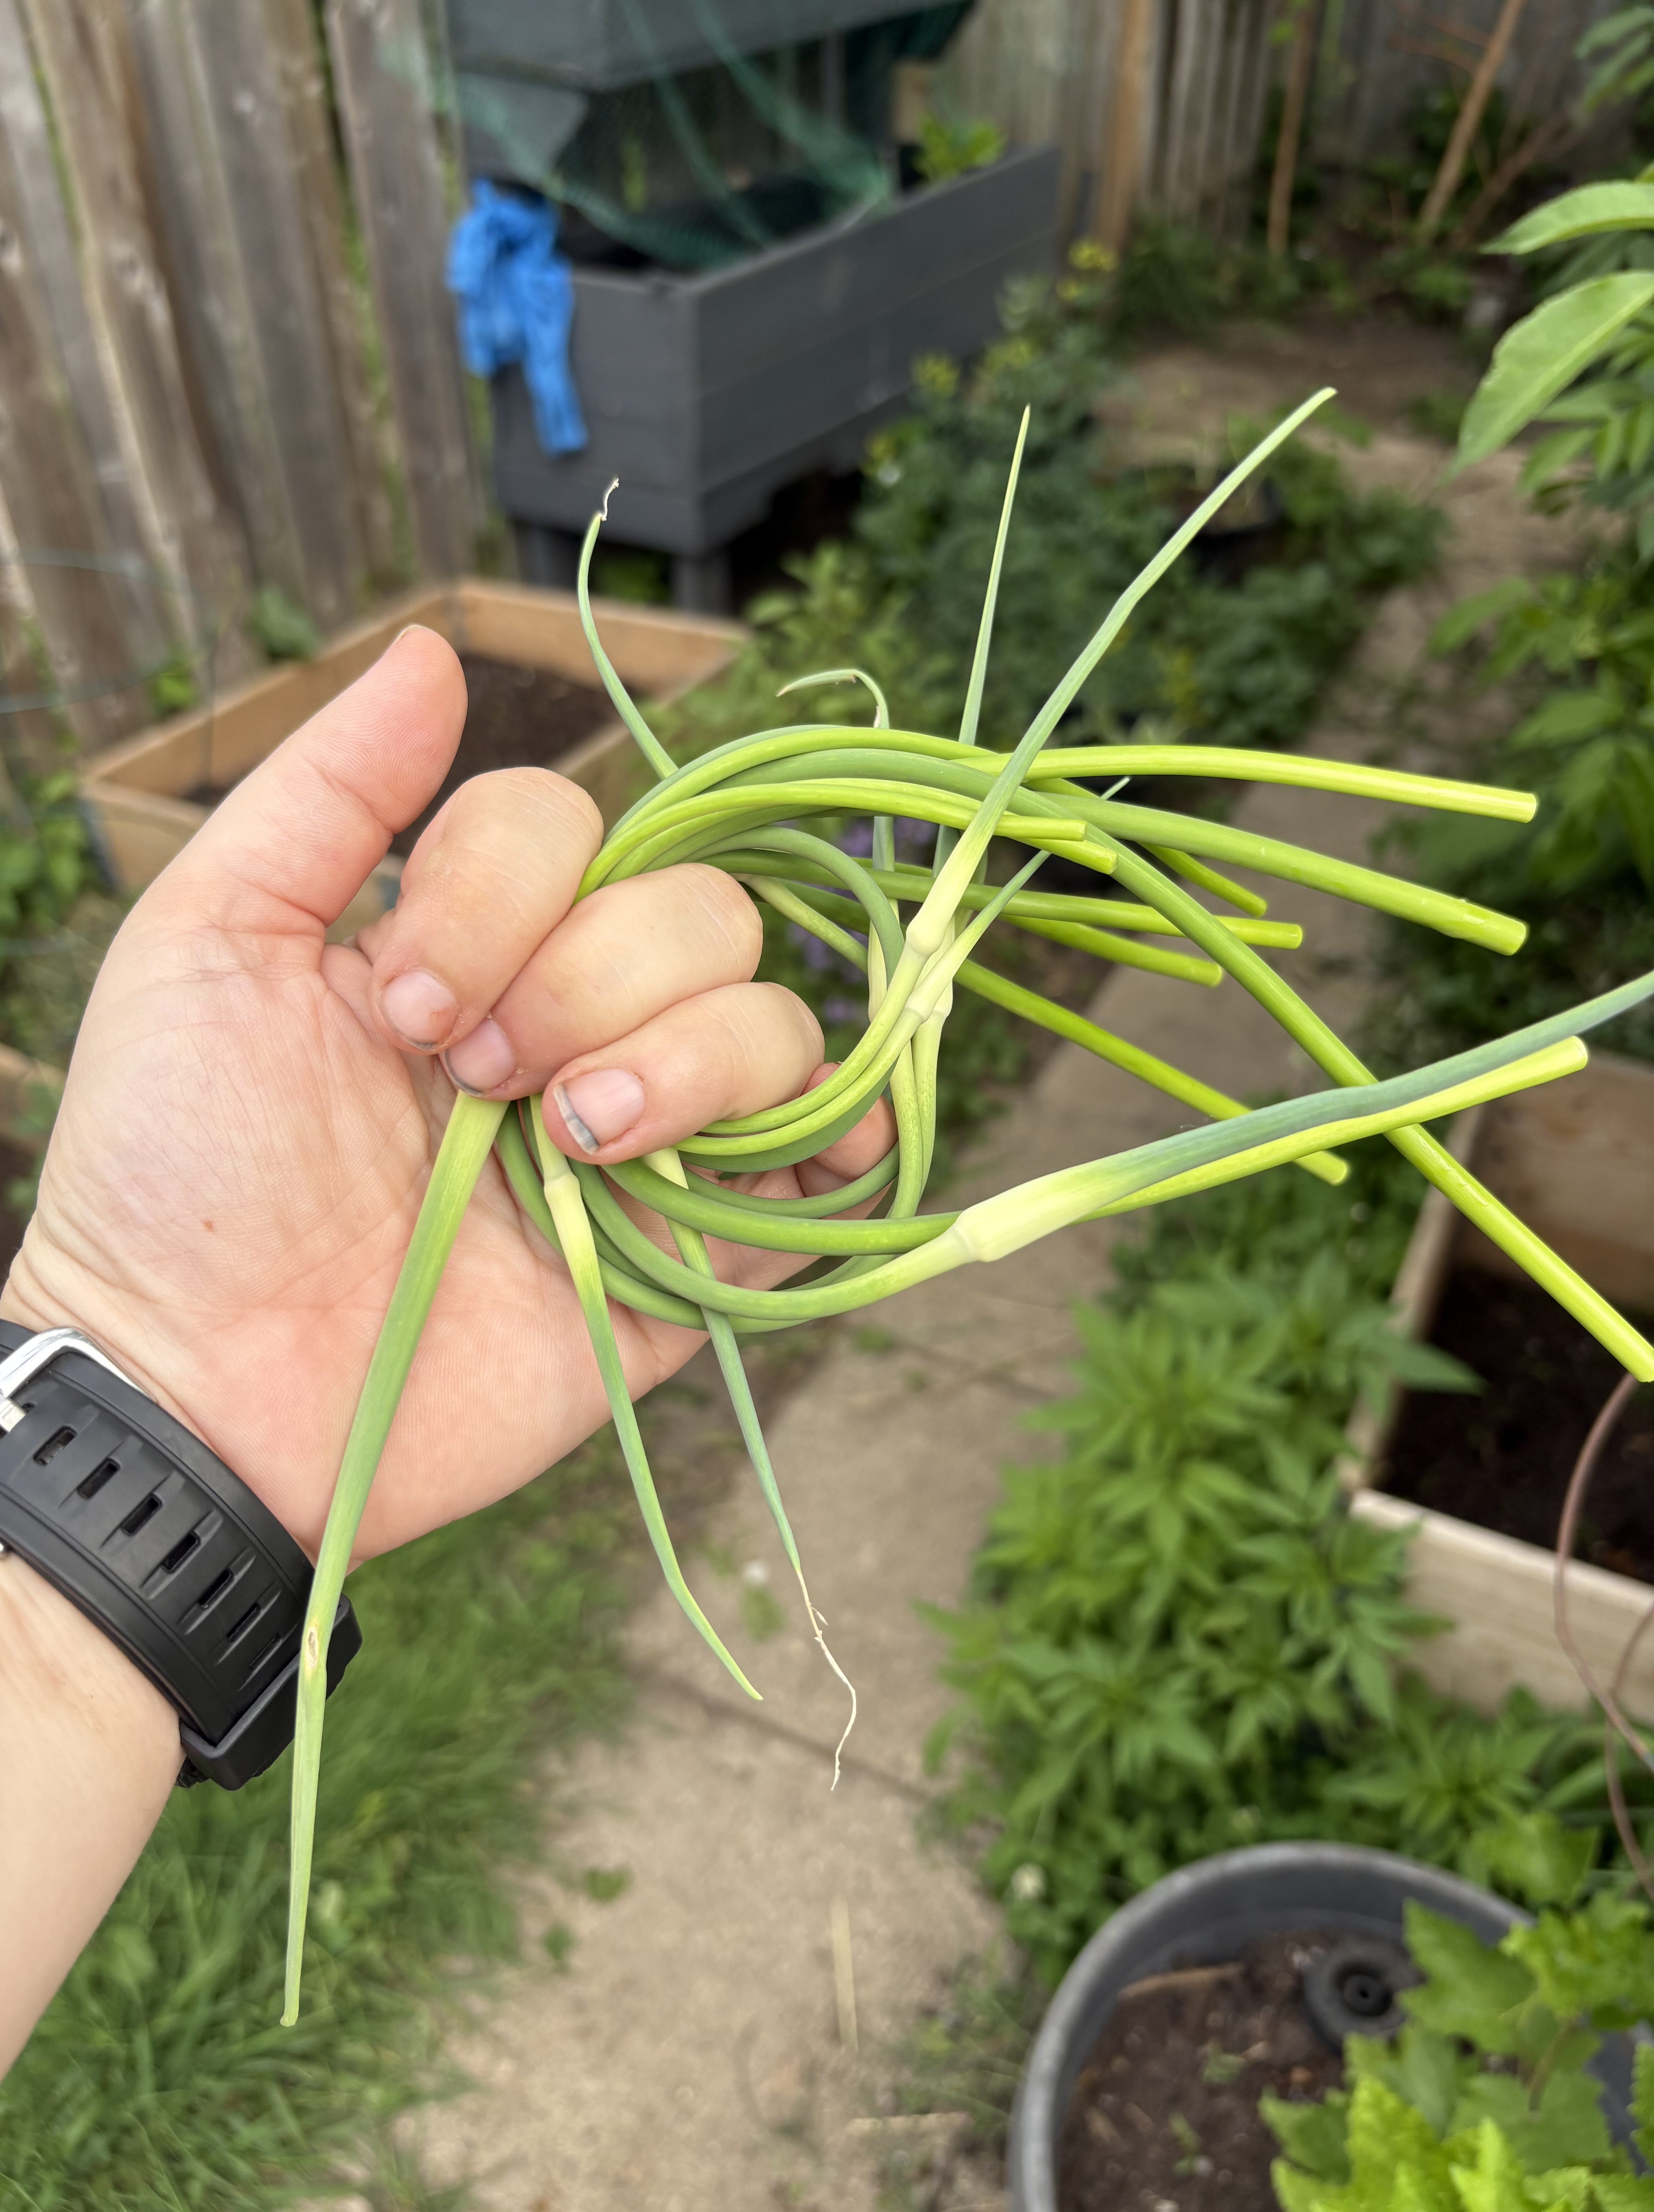
Garlic Scape Salt
It’s that time of year! Garlic scapes are so delicious, but after my freezer is full, and there’s still more coming, I make scape salt. It’s so easy.
Pick your scapes.
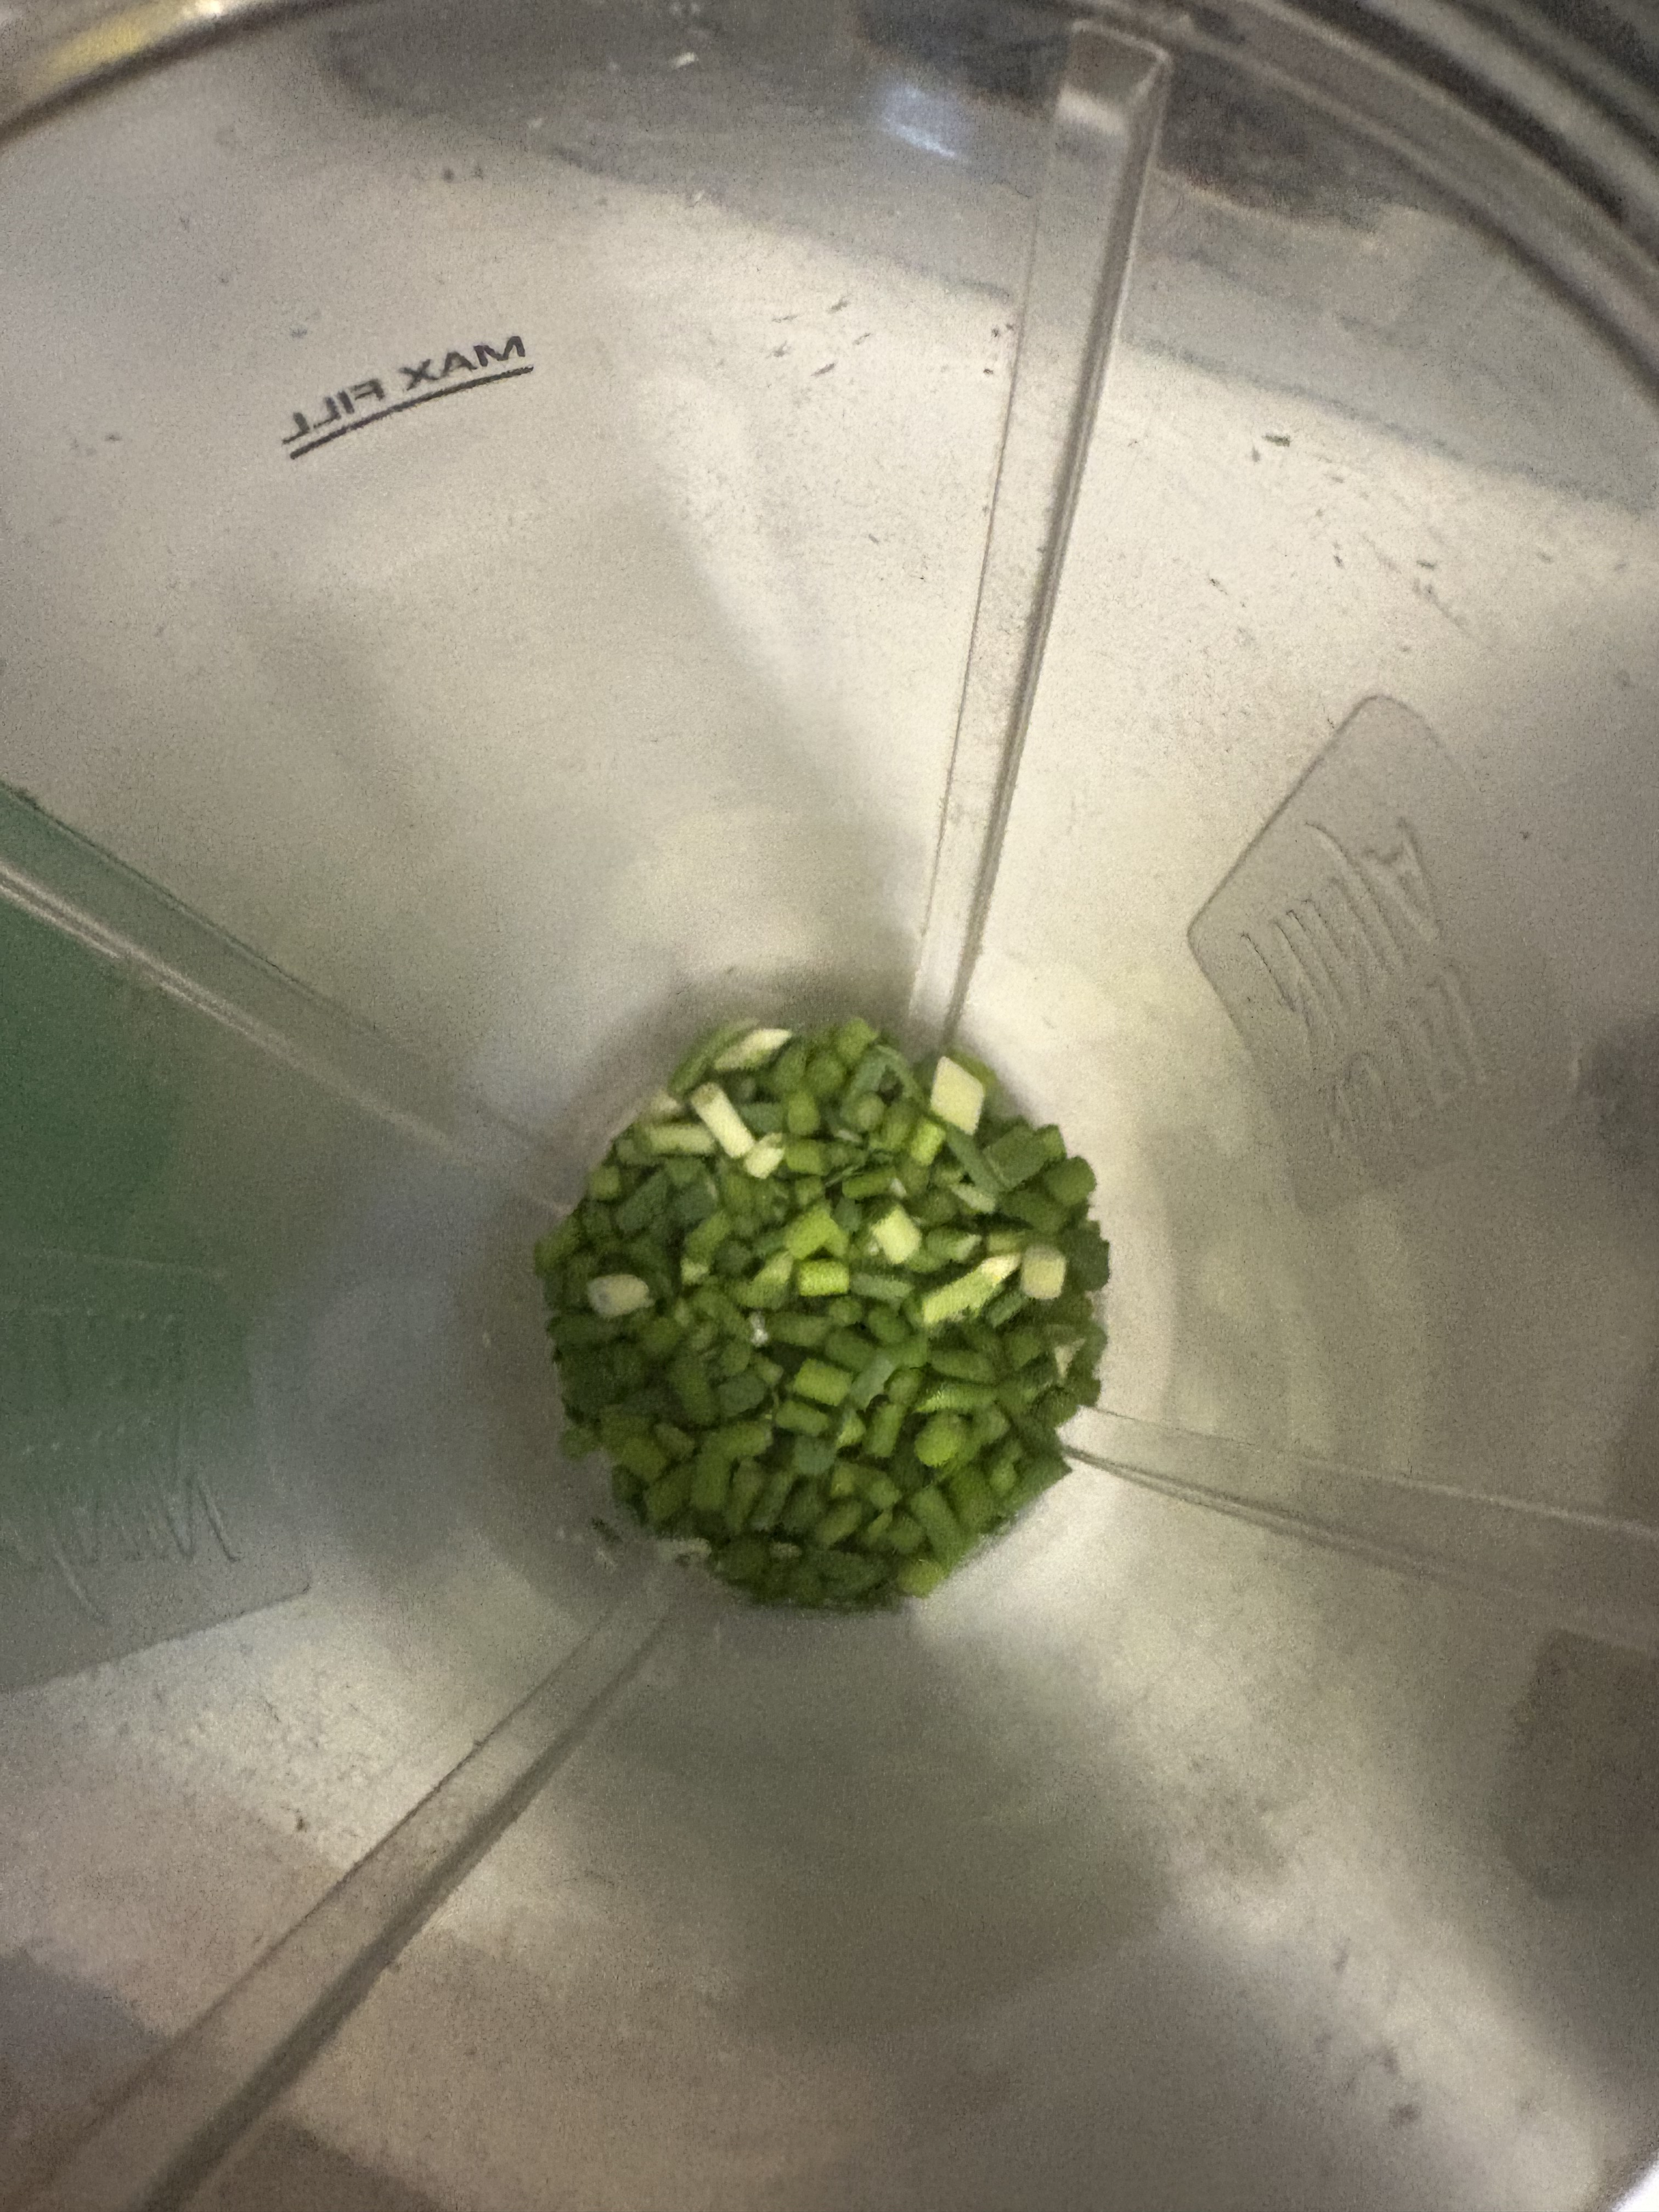
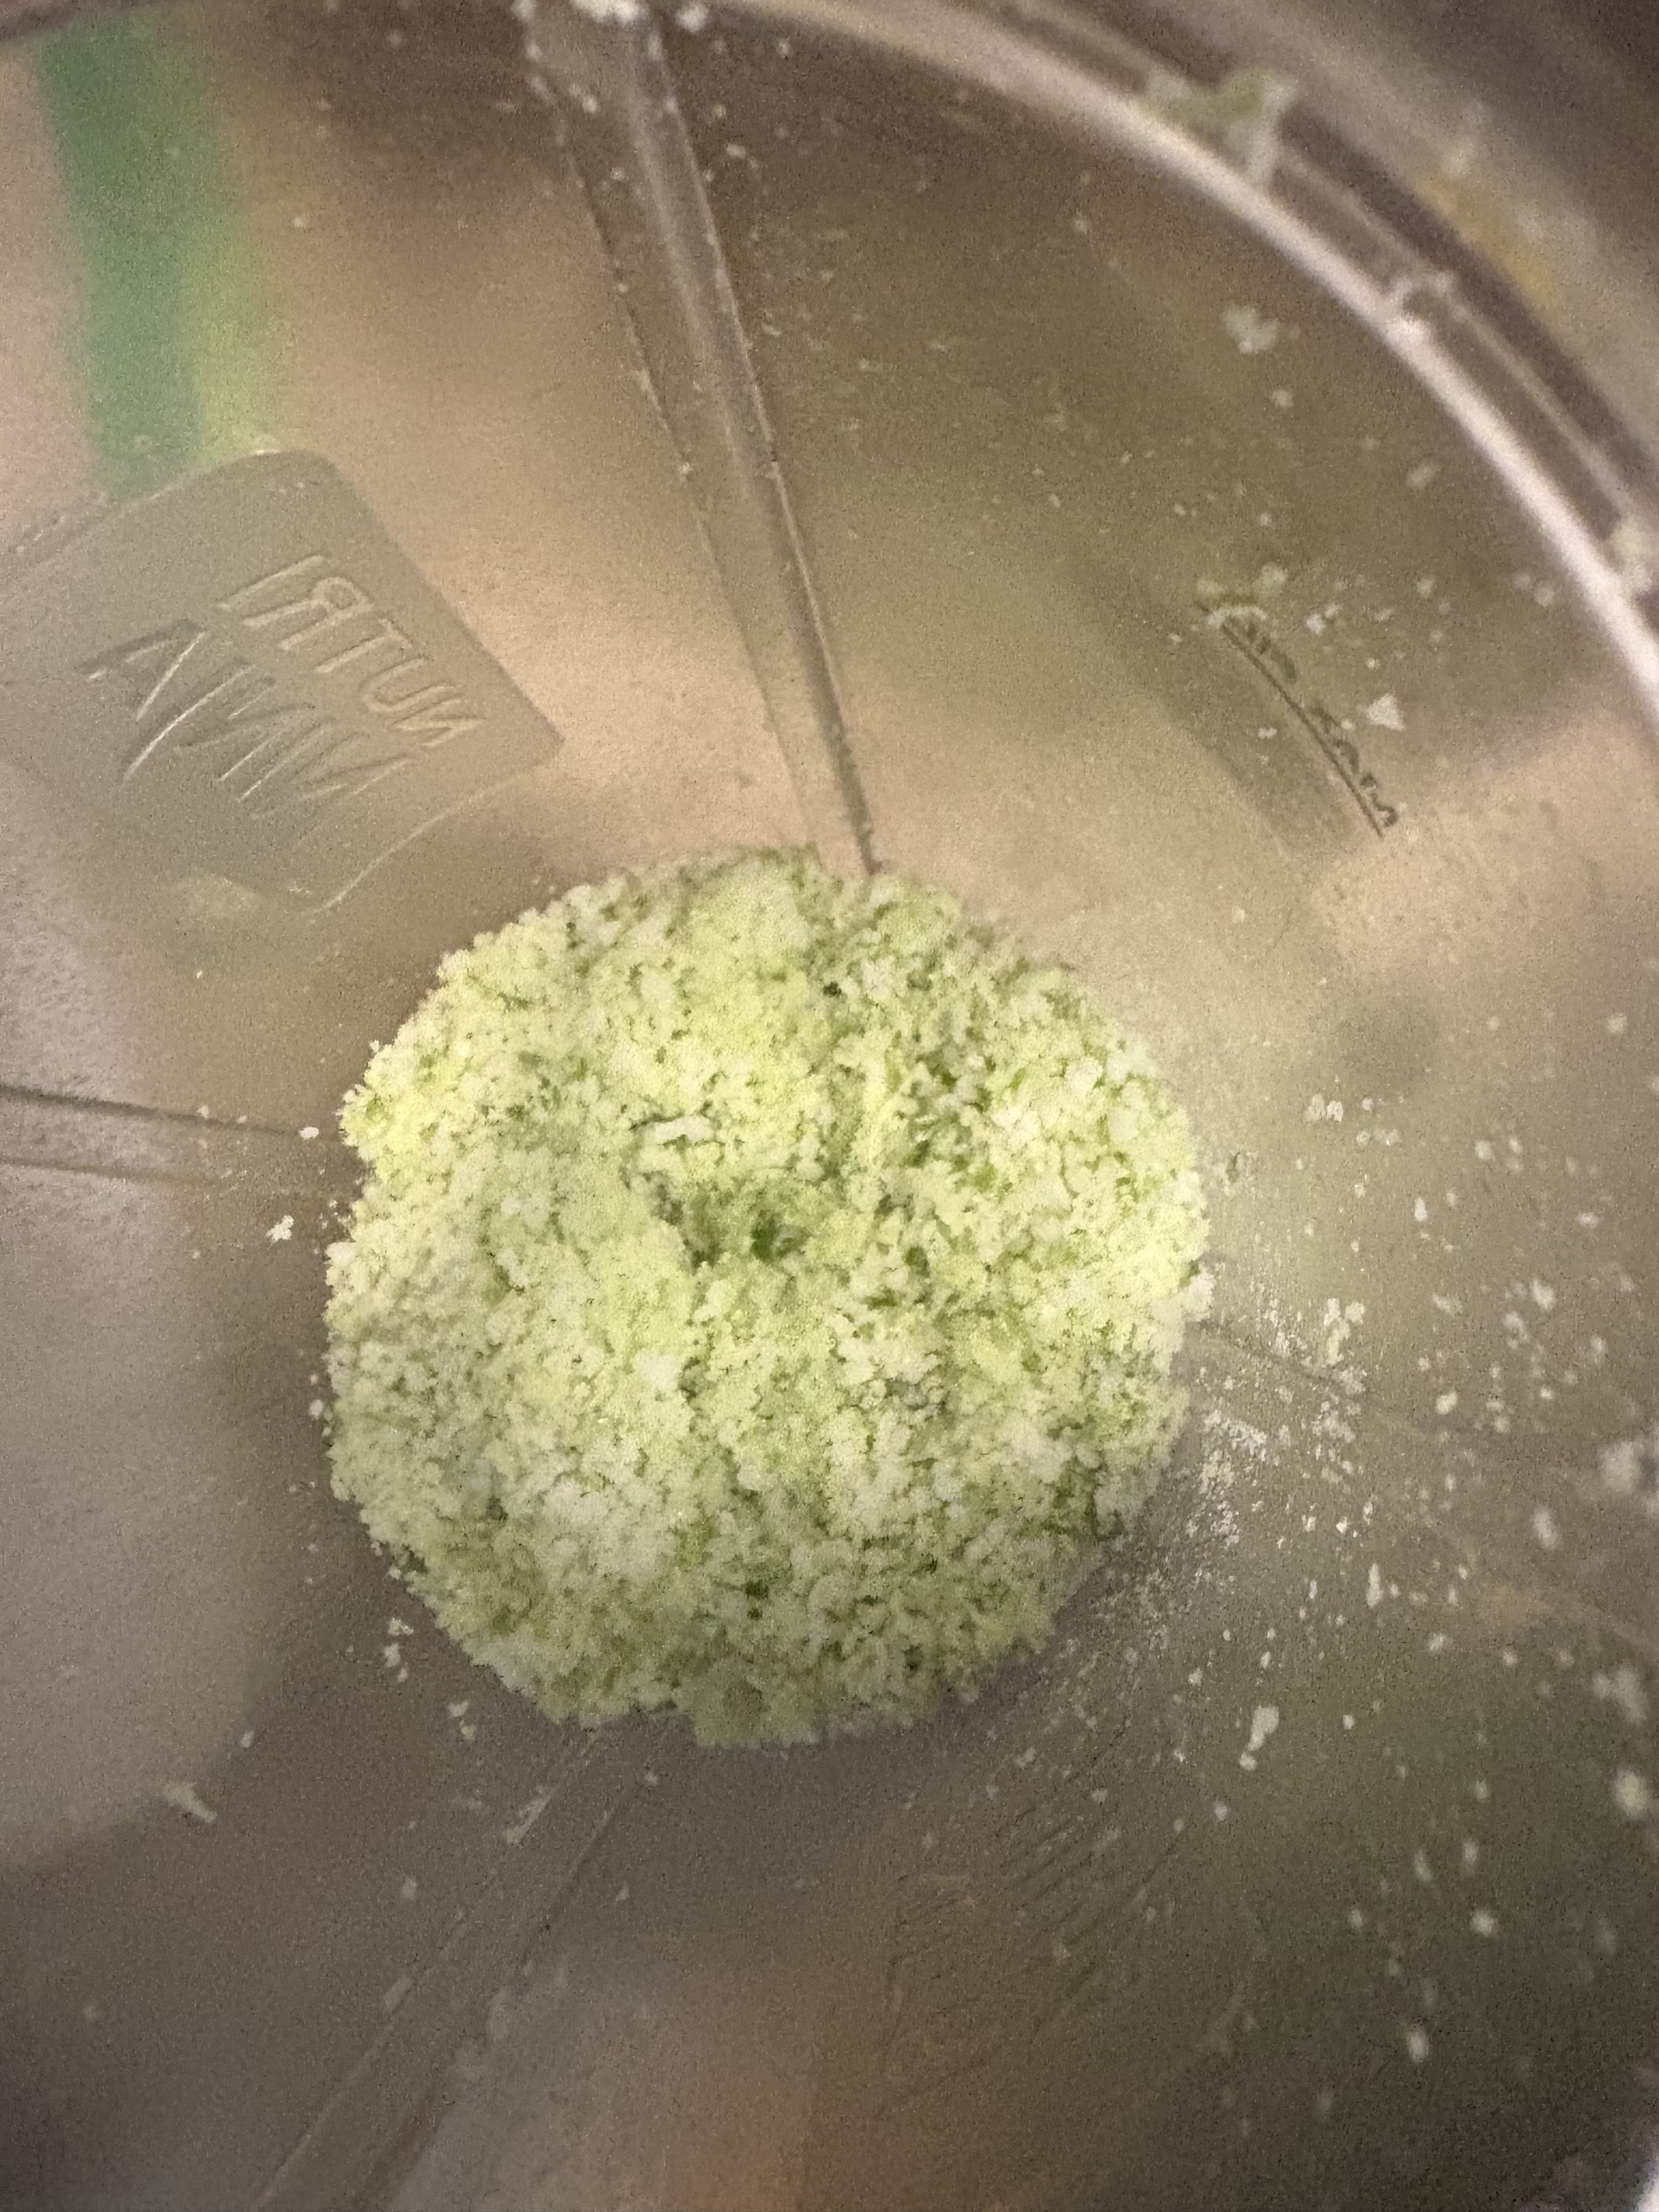
Throw them in the blender with salt (I used coarse sea salt).
After they’re thoroughly blended, spread it out on a tray to dry a bit. Pack it into a jar and store in a cool dry place. Voila!

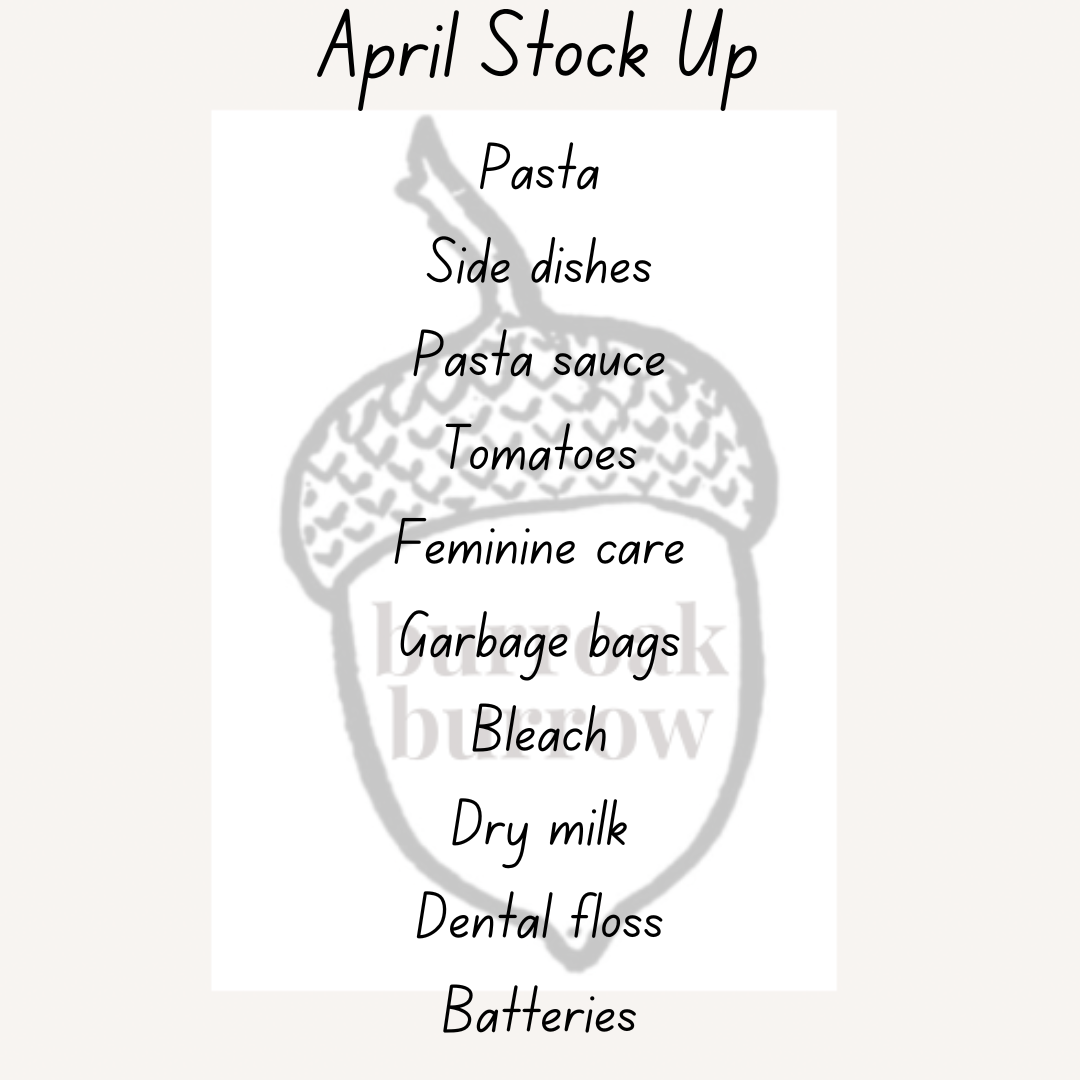
April Stock Up
Welcome to April!
This month we have a solar eclipse! Some local governments are recommending caution due to large crowds and issues that can come with them. They’ve recommended having extra groceries, a full gas tank and other basics like that. I think most like minded individuals have these things anyways, but be cautious (as always) and if you watch the phenomenon make sure you protect your eyes!
April is when we start spending more time outside so I am also making sure I have things like sunscreen, garden supplies and seeds, and of course things like chalk and bubbles. Our foraging will also increase in April.
Make sure to keep an eye out for the following things on sale:

March Stock Update
March is nearly over! I hope everyone has had a good month full of celebrations. I’m so thankful to have a long weekend with my family.
I didn’t buy much on this stock up as any extra went towards the holiday meals and garden supplies (which count as stocking!). Here’s a quick example of some of the stuff I picked up.

The beans and lentils are quite cheap if you buy them dried and they last for a really long time if you store them properly. They’re even cheaper if you buy them in bulk, but little bags like this are perfect to pick up every time you shop as they’re only a couple dollars and they add to your stock quickly.
I like to buy our over the counter medications so that I have an open one, one on the shelf and one extra to put up then rotate through as they get used up. That way I never have to panic and run to an all night pharmacy when the kids wake up sick.
I use the same stocking system when it comes to other non perishables, such as the cleaning supplies I bought for March spring cleaning.
Its beginning to look like a greenhouse in my living room (the only place with good lighting) with seedlings and pots of dirt everywhere. I’ve also started foraging for early spring plants as they’re popping up everywhere and in large, sustainable amounts.
What did you get up to in March? Have you started seeds? Did you take advantage of the sales related to the holidays? Do you now have pounds and pounds of chocolate?
Make sure to follow us on social media to keep up with everything that doesn’t necessarily make it to the blog!

March Stock Up
March has so many different holidays in many cultures so there is all sorts of basic ingredients on sale! What better time to stock up?
For holidays we have (in order) Ramadan, Purim, St Patrick’s Day, Holi, Palm Sunday and Easter. In addition to the items on the stock up list, which is fairly generic, you can also find on sale lots of dried fruits, nuts and seeds. Corned beef and cabbage should be on sale near the middle of the month (and cabbage dehydrates wonderfully). Of course with Easter there’s mountains of sweets and hopefully we will see turkey or ham be on sale.
Additionally it’s a good time to grab oxygen absorbers, candles and garden seeds.


Those Old Onions
It happens to the best of us, you reach into the bag of onions and you find greens. Sometimes you can still use these onions but other times, well, they’re gross. Instead of tossing them in the garbage or compost heap, watch my video on how to plant them so you get more onions!
Chive Blossom Vinegar
Every year I have a bumper crop of chives, regardless of the weather. I’ve started using the blossoms as I can’t possibly eat all the chives themselves, especially if I let them spread their seeds everywhere. My favorite way of using the flowers is making flavored vinegar.
Here’s a quick video we made:

Simply fill a mason jar with the fresh beautiful flowers and top off the jar with white vinegar. (If you want to get fancy, white wine vinegar is amazing in this.) Let the jar sit in a dark place for a couple weeks. When the vinegar is a pretty pink color, it is ready to use. Strain out the blossoms and use the vinegar on everything! Its got an awesome light onion flavor, it tastes so good on salads, raw veggies or anything potato.
Let me know if you try it!
Supplies:
Jars (https://amzn.to/2UrfDTh )
Chive seeds ( https://amzn.to/2yWd3hq )
Vinegar

My New Greenhouse
Guys, I’m so excited about my greenhouse. It was a birthday gift from a friend but I’ve finally got the chance to set it up and start using it. If you follow my Instagram, you’ve seen it but here’s a quick pic and the promised review:
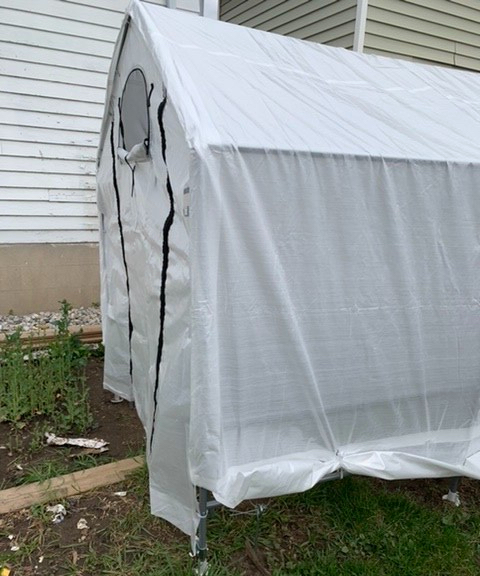
Greenhouse!
It recommended two people to set up but it really was only a one person job, the trickiest part was getting the tarps on. It’s 6x6x8’.
It has stood up to strong wind and rain in the Canadian spring season. My plants inside are super happy. It has two built in shelves with lots of space for more shelves of your own.
Here’s a quick amazon link if you want to check it out for yourself (https://amzn.to/2ZfFMIR)

Prepping with Pumpkin
Tis the season of the pumpkin!
A couple days after Halloween, a friend of mine asked me if I wanted some pumpkins left over from landscaping. They were large and hadn’t been carved so I said sure! I hate to see them go to waste.
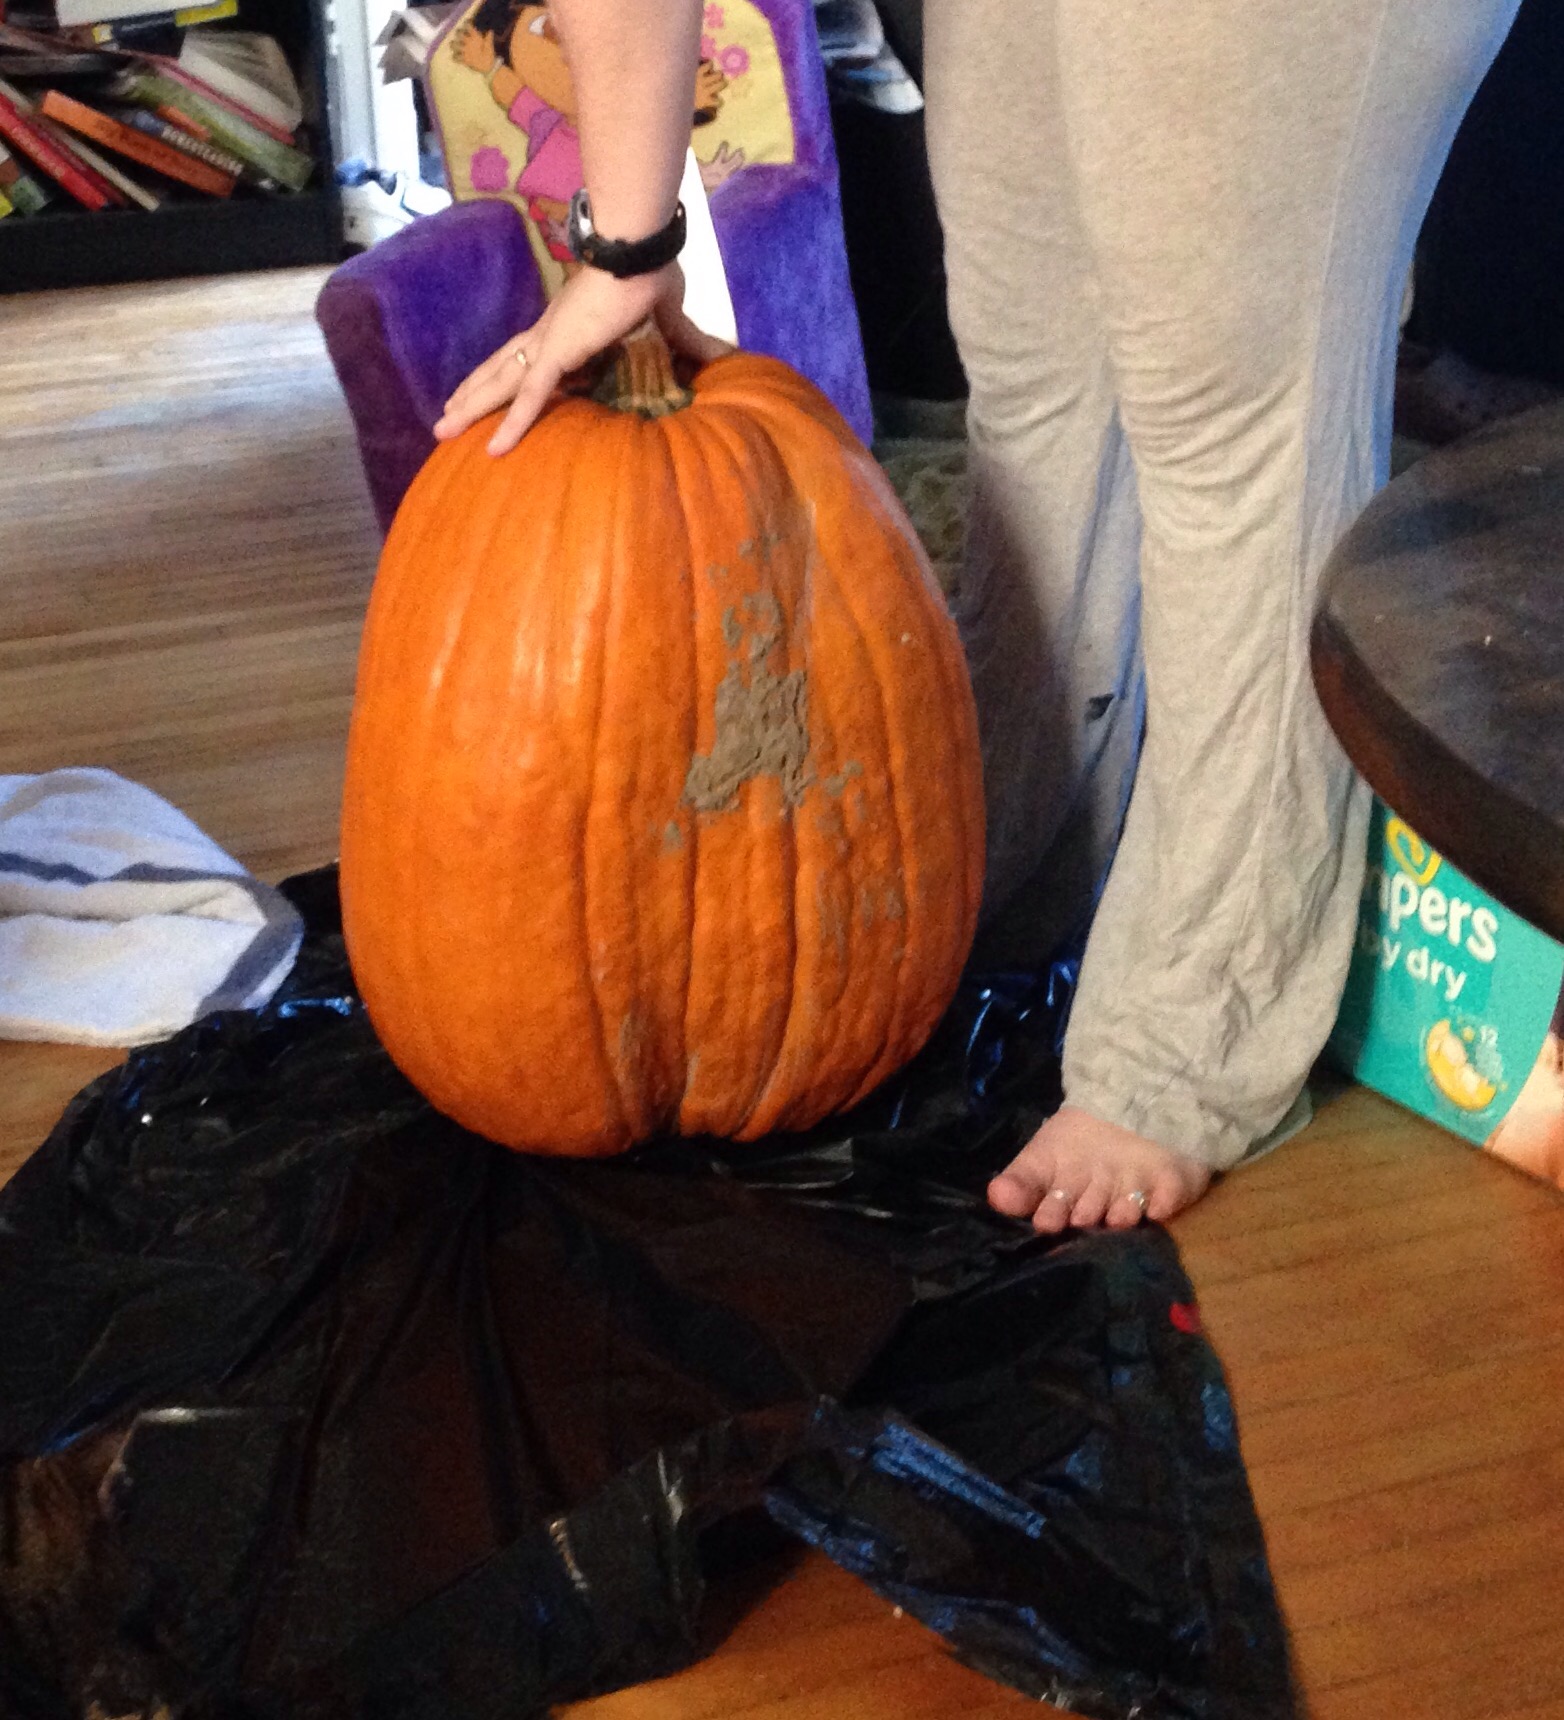 This picture is the smallest of the three I received.
Two I opened up, gutted and saved the seeds then cut up and roasted the flesh for puree (more in a sec). The third made for great machete practice!
To make the pumpkin purée, I cut the flesh (after scraping etc) into manageable sized chunks and put them on a cookie sheet with skins up. I baked them at 350 F for about 2 hours (they had super thick flesh, start at 45 minutes, it’s ready when a knife passes easily through). Let them cool a bit then scrape all the good stuff off the skins with a spoon and let cool further. The skins then went into my compost.
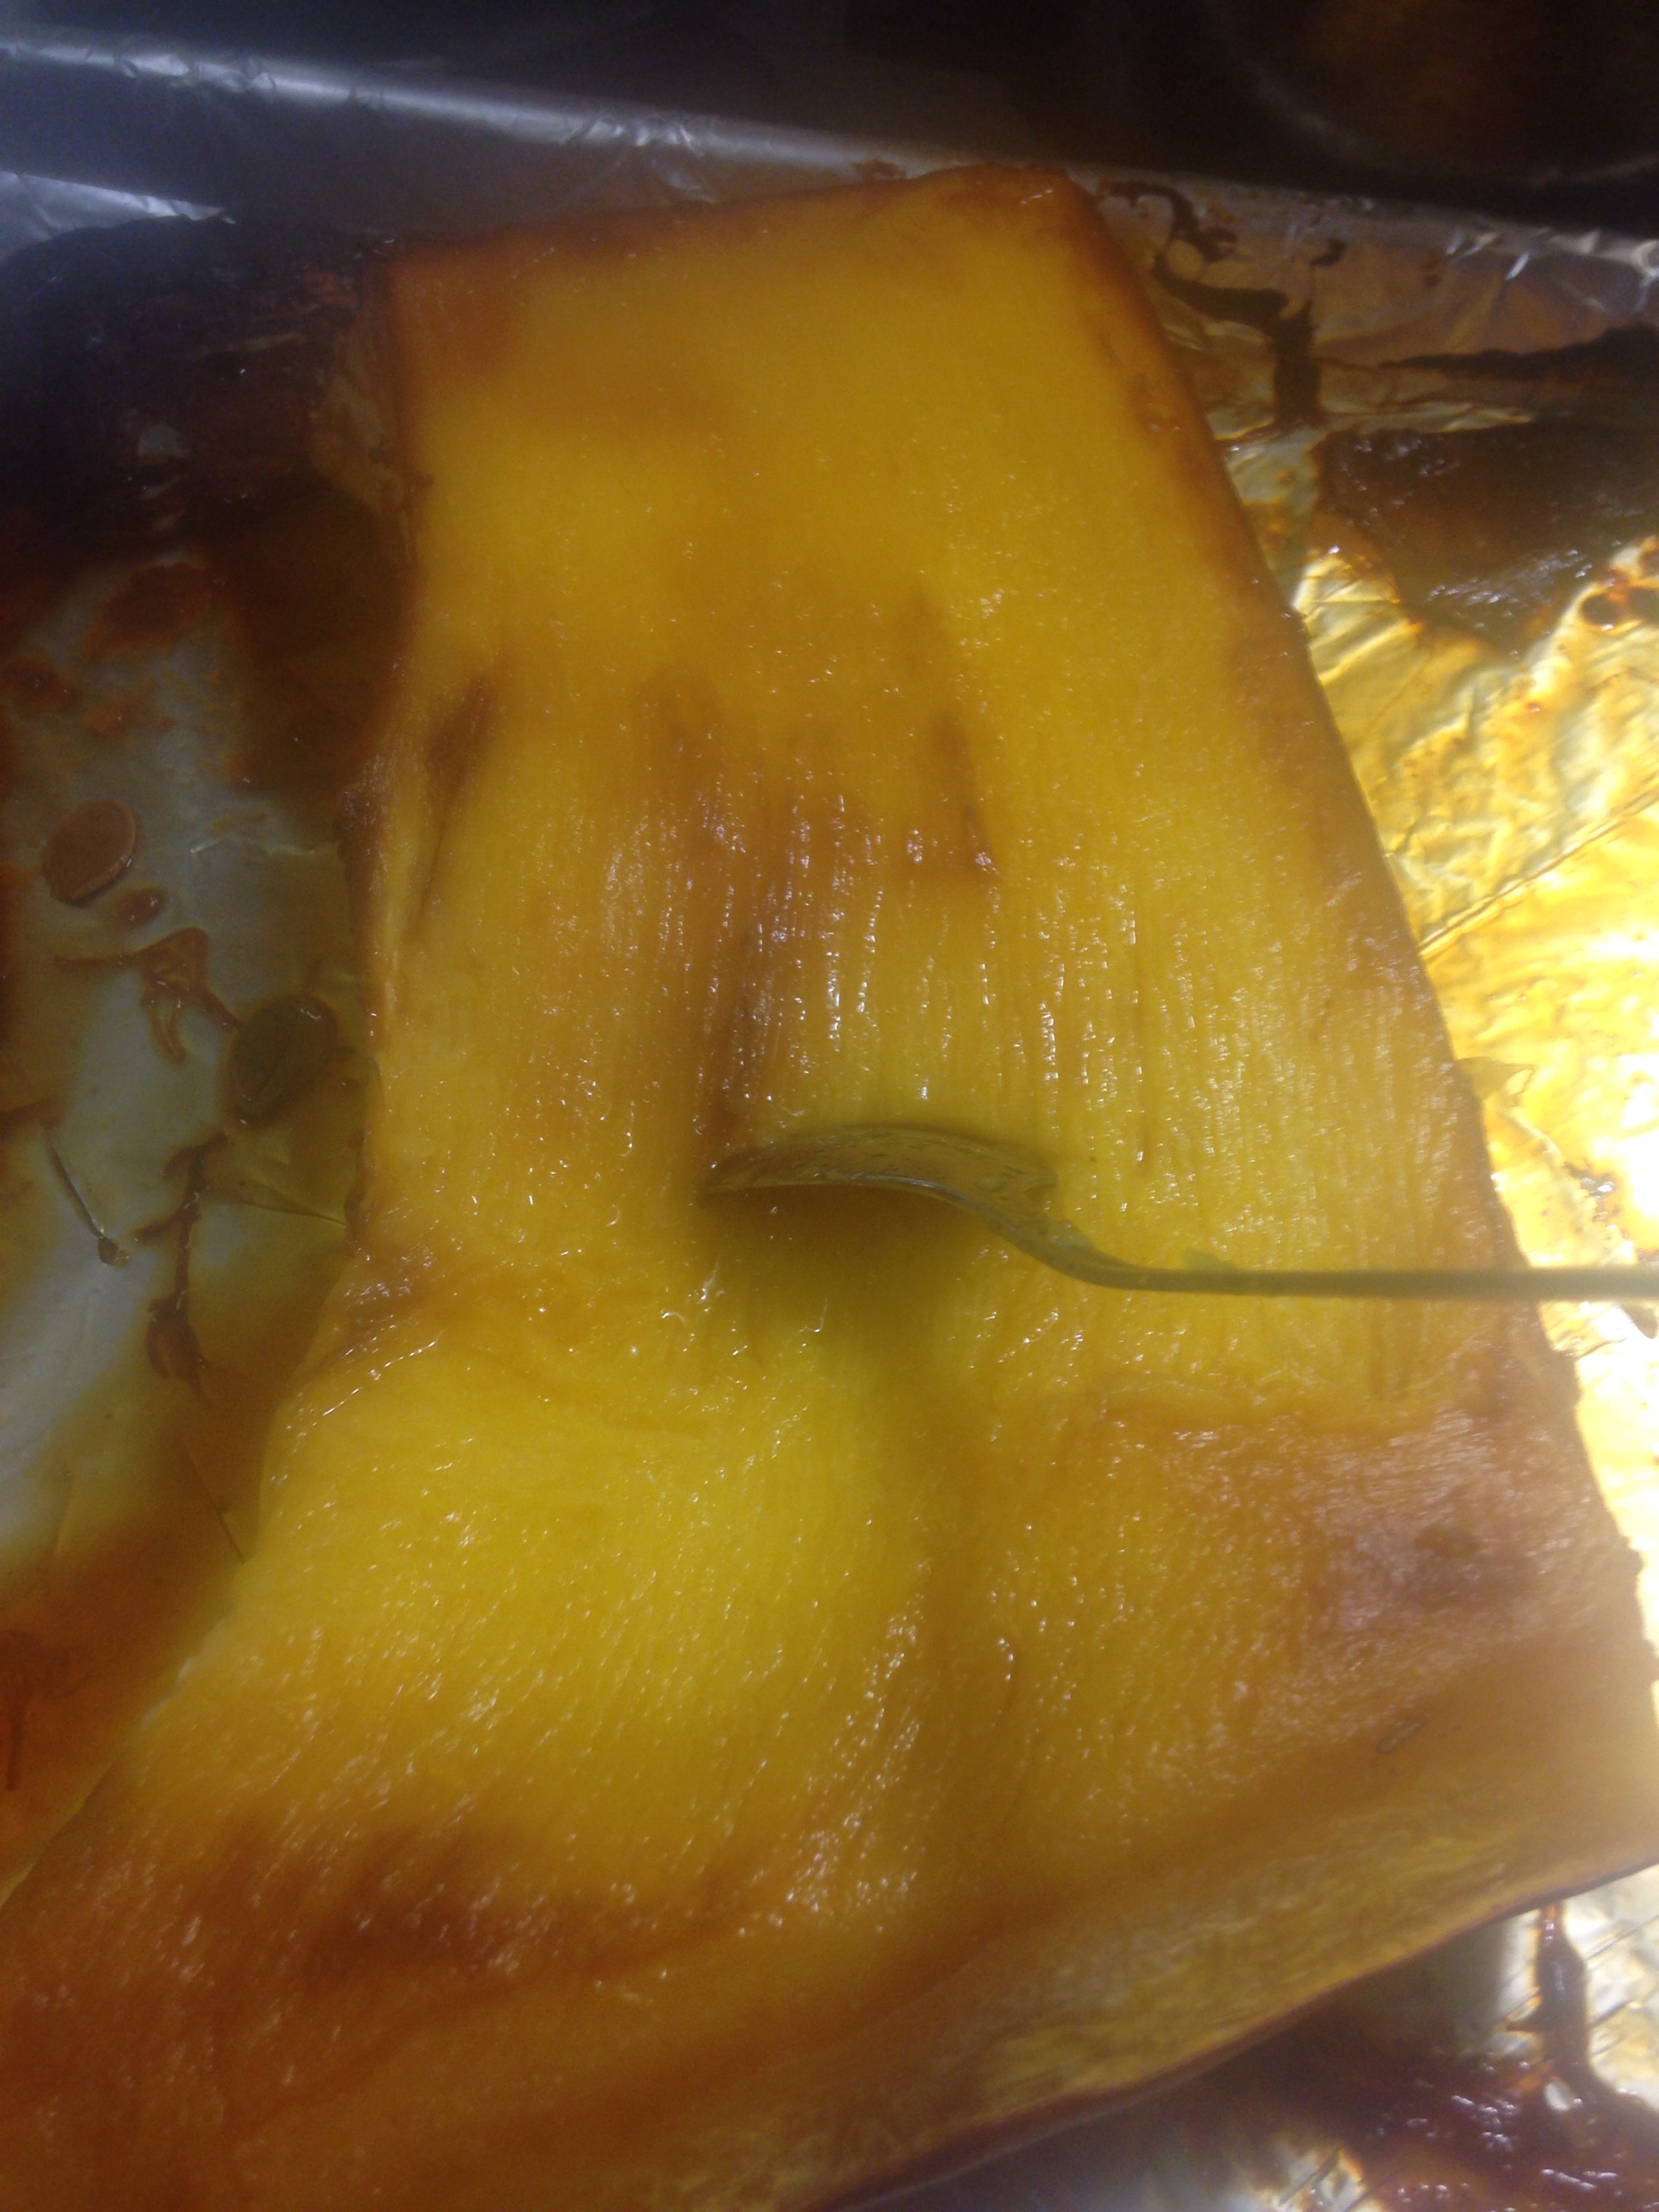
The roasted flesh then went through my blender (but you could easily use a food processor or food mill) then into freezer bags.
If you’re freezing it, get as much air out as possible and freeze flat. You can also dehydrate the pumpkin purée, if you don’t have the fruit leather tray covers, use parchment paper to line your trays.
Half the seeds I roasted for a snack for my family and the other half will be planted come spring.
Pumpkins are cheap and plentiful this time of year, with many grocery stores putting them on clearance after Halloween or thanksgiving. Don’t pass up your chance for a whole lot of food for little money!
 About 3/4 of the above pictured pumpkin.
Chive Seeds
Tis the season for gardening and any prepper can tell you that the more food you can grow on your own, the better.
I have a huge clump of chives in my back yard. They come back every year and spread from their roots so I had no idea they had seeds or that I could harvest the seeds to share.
To start, you need to find a clump of chives that has flowered. Select flowers that have mostly dried out.
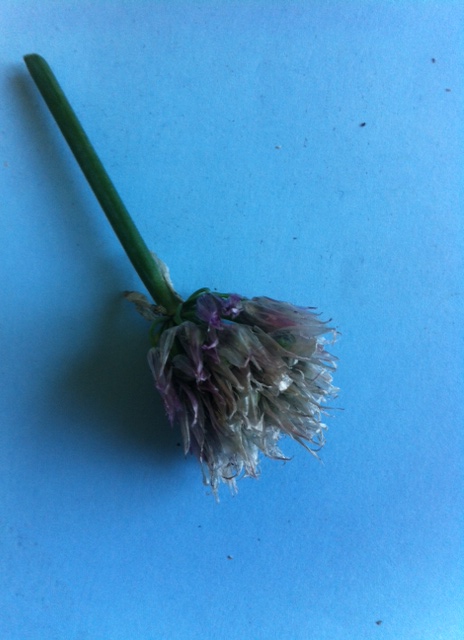
The tips of the flowers should be white and thin like tissue paper. The next thing I do is separate the flower blooms from the stem, to make them easier to sort.

The dry flowers I set aside for processing and the not so dry flowers I either let air dry for a few days or compost if they are not even close to being ready.
When you pull apart the flower, inside you will find a dark green to black ball, this is where you will find the seeds. Cut this apart, it should divide into three parts, leaving you with some sacks covered in a thin green film.

In each of these sacks is two chive seeds, gently remove the green film to reveal two small black seeds. Set the seeds aside to dry (I put mine on a paper plate away from any breeze) and then store. Chive seeds can be finicky and may only last a year even under optimal storage, so be sure to share with your friends.

Here is a link for some chive seeds if there are none local to you : https://amzn.to/2UcXfyR
