Category Archives: preparedness
Dehydrating Citrus – and Why It’s Important
Vitamin C is a very important nutrient that seems to be lacking in a lot of survival foods. Getting enough vitamin C is vital in an emergency situation. It is necessary for collagen synthesis (collagen is what heals your wounds, and knits the skin back together), without it your new wounds may not heal properly and older cuts may start to fall apart.
Enough vitamin C can cut back on how often you get colds and flus and cut back on how much they affect you. It can also delay the onset of certain neurological disorders such as Alzheimers. It is essential for drug metabolism, helping medications to reach their full potential in your system.
Sources of vitamin C include: broccoli, sweet bell peppers, sprouts, kale, spinach, tomatoes, strawberries and of course citrus fruits. Citrus can be found easily and cheaply by almost everyone and it is so simple to dehydrate.
Pick nice, firm just ripened fruits. Cut into thin wheels (1/4″) and lay on your dehydrator trays. Using a temperature controlled dehydrator, set it to 125° F. It takes about 6-8 hours depending on the humidity in your area, it could also take more. (Here’s my dehydrator: https://amzn.to/39aoRbO )
To use your citrus, you can place it in glasses of water or juice to add flavor or you can powder the inner parts to make juice mix. Make sure to store your fruit in airtight containers in a cool dry environment.

dehydrated oranges
Basic EDC
An EDC, or Every Day Carry, is a kit that you take with you everywhere. It is smaller than a bug out bag and a bit more than most people usually carry. It is a good idea to carry one of these in your backpack, work bag or purse. Do not leave it in your car (I’ll cover car kits another day).
A basic EDC has enough stuff to get you home should you be stranded at work or school. You can think of it as an extended overnight bag if you will, I usually have most of this stuff in my purse. A basic kit might include:
soap
shampoo and conditioner
toothbrush and toothpaste
a can of tuna or other high protein food
a higher carb option (as seen in the picture –ramen noodles)
chocolate or candy
space blanket
a way to start fire
a candle or other heat source
a flashlight or glow stick
tea, coffee or other hot drink
water
a higher sugar and energy content drink (soda or sports drink)
first aid items (the metal tin in my photo contains cotton, ibuprofen and other basic medicines)
Also included (but not seen in the picture) is some money, self-defense tools, a small notebook of basic survival information, basic maps of the city and surroundings, chap stick (which you can use as a fire starter in emergencies) and a book or set of cards in case you get stuck somewhere.

Bug Out Bags 101
A bug out bag is a bag that you keep full of supplies ready to go at a minutes notice in case of an emergency where you leave your home. It is also known as a GOOD bag (Get out of Dodge) or a 72 hour bag. There is a few different types depending on what your plan is. Be sure to use a heavy duty bag with good supports (such as a waist band and thick straps, possibly with metal framing).
A basic bug out bag contains everything you would need to survive for 72 hours away from home or as long as it would take you to get to your retreat spot, including:
Shelter (such as a tent and sleeping bag, making sure to buy weather appropriate)
Food (usually light weight such as dehydrated or freeze-dried and a way to cook said food ie: pot, mini camp stove or fire making implements)
Water or a way to purify water (here’s a handy mini filter I keep in my purse)
First aid requirements (bandages, alcohol swabs, gloves, gauze etc)
Any medications you or your family requires
Small amount of cash
Hygiene needs (toothbrush, toothpaste, comb, shampoo, fem care etc)
Self defense
It’s also a good idea to have a survival manual of some sort and a copy of any important documents (birth certificates, deeds etc which you can scan and put on a thumb drive)
Many people carry an EDC (everyday carry bag) which includes a lot of the stuff already mentioned but it is said in the prepper/survival universe: “two is one, one is none.” or as I say “rather too much than too little”. Your bug out bag should be as individual as you are. No one can tell you exactly what to put in your bag because we don’t know where you are or where you are going. I do recommend the above list as a starting point and that every family member have their own bag in case someone gets separated from the group. It is a good idea to keep your bug out bag readily accessible (in the front hall closet etc) so you always know where it is. Keep in mind this is a very basic list to get you started on thinking about what you might need. Just remember, you will have to carry this at least part of the time so make sure it doesn’t weigh you down so much that you can’t function. A good exercise is to strap on your bug out bag and go for a hike, see how far you can make it with the weight and adjust as necessary.
Prepping for Feminine Hygiene
This is a subject that I haven’t really seen a lot of information on out there so I thought I’d let you all know what I do to prepare for those fun once a month times. Men, you may want to stick around too. (Got women in your family? Need something to barter?)
A while ago, I started a non-profit organization that makes and sends reusable menstrual pads to women in need. Before sending my first package (it went to Africa), I decided I can’t very well send a product that I don’t know anything about so I tried them for myself and never looked back.
The premise is simple. Why fill your valuable shelf space with packages and packages of plastic pads and tampons that you will only use once and then throw away. (Throw away where? Now a days to the dump where your biological material can seep out into the water system- gross. Or after an emergency, well I guess you could burn or bury it). I found a simple pattern online (using an envelope style pad with an insert) and make the pads from donated sheets, pyjamas etc. When done with it, throw it in the wash (or to avoid stains, soak in cold water first).
So, we’re saving space and the environment so far (not to mention the almighty dollar!!) Find a pattern online, sew together some pads and hang on to them. Even if you don’t want to use them now (or you’re a guy, or your daughters are too young) it’s not a bad idea to have a sustainable option for when you might need it. Again, you can barter with these if you don’t need them for yourself. My non-profit runs a program where if you buy one pad, one gets donated (we also just donate anyways but its nice to have a little bit of help in the running costs).
Want to make your own? There’s plenty of free patterns out there and most people have an old flannel shirt or something they can part with.
Not crafty? You can buy reusable pads here and menstrual cups here

Heat Illness
All over North America, we have been having crazy heat waves. In some places, people have been without power due to bad thunderstorms. Today its only 91° where I am but the other day was 114° and most of my family was sick due to the heat (not to mention sweaty and miserable).
Its important to recognize the signs and symptoms of heat illnesses (hyperthermia), especially in a survival situation where you can’t just pop into the mall with air conditioning.
There are a few levels of heat illnesses which progressively get worse if you don’t take care of yourself.
Heat Cramps: are caused by not having enough water and being too hot. Symptoms include: thirst, sweating, irritability, gastro symptoms (nausea, vomiting) and of course cramps (particularly in the abdomen).
Heat Exhaustion: excessive sweating, dizziness, headaches, confusion, COOL to the touch as well as all the previous symptoms. Treat these people as being in shock (but do not cover with a blanket, instead remove excessive clothing).
Heat Stroke: skin will be hot in heatstroke because the mechanism that makes you sweat to cool you down isn’t working anymore. The person suffering might be in shock, confused, as it gets worse you can start seeing things such as unconsciousness and seizures.
Always try to get the victim out of the heat (indoors or into shade). If they are conscious get them to drink cool water (but do not force them if they vomit). To increase cooling you can sponge them with cool water or cover them with cool wet sheets. Obviously, if available, get your person emergency medical attention as soon as possible.
Try to avoid heat illnesses by avoiding heavy work in severe temperatures, wearing hats and staying hydrated.

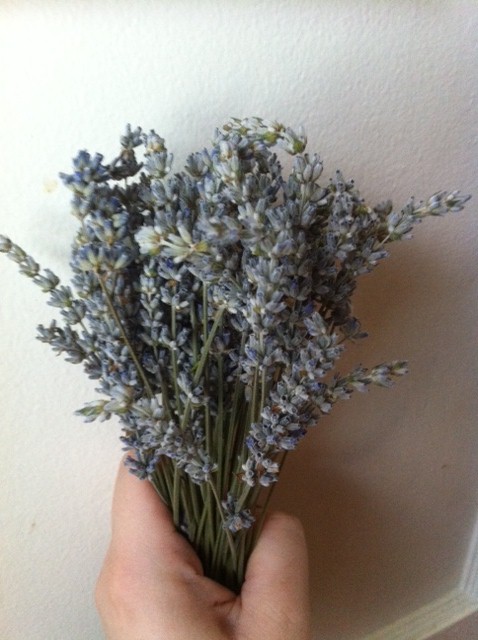
Lavender Essential Oil, a Prepper’s best friend
Lavender essential oil is indispensable to a prepper.
You can use lavender oil on just about any skin irritation. Burns, scalds, rashes, bug bites (especially spider and mosquitoes I find), cuts, acne, seriously just about anything. All you do is put the lavender oil straight on the area of irritation, you don’t have to mix it with anything and you just need a tiny drop to cover a good area. It doesn’t sting like some modern medicines, it soothes and reduces scarring. In a household with a chef and kids, we use it a lot and don’t have nearly as many scars as we should!
It can also be used as a bug repellent, an antiseptic, an antidepressant. The scent is used in aromatherapy to relax and calm the client. It makes a good treatment for head lice, sunburns, helps to treat clinical shock and muscle pain.
Its edible and can be used in cooking (although I usually stick to using it in desserts, it apparently goes well with rice or fish).
Basically this is a natural wonder drug that is so much cheaper than buying all the separate medications needed to treat the above issues. If you had enough of the flowers you can make your own essential oil (you’d need a distiller, I’ll blog about that another day). Here is some lavender oil, (make sure you get undiluted). So let’s hear it for lavender!!
Tips for Keeping Up Morale
Life post-SHTF will be very different than what we are used to. Different, harder, crueler and probably nothing like we expect it to be. We will have to deal with boredom (which can be a killer). People in the same environment for extended periods with a loss of privacy, a lack of hygiene, emotional issues, not to mention food fatigue and the digestive problems this can bring on will definitely need something to keep their minds off of things.
All of this is enough to bring anyone down. It is important to keep morale high. Boredom can lead to depression and depression can lead to a loss of will to live. This obviously is counter productive to our survival plans. So:
Give people a job to do, establish a routine. I’ve said it before, people thrive on routines. When you know what to expect and what your day looks like, it makes it easier to deal with.
Make sure you have entertainment. Books, games, decks of cards, coloring books for the kids, anything. If you don’t have a physical source of entertainment, put on a play, sing some songs or have a talent show.
Learn some skills that are fun and productive. Knitting or crocheting (which can be done with whittled sticks and plant made fibers!) can produce clothing, wash cloths, blankets and even nets for fishing. Wood working can make utensils (for eating and cooking), bows and arrows for hunting and improve your shelter!
Include some goodies in your preps. Candies or chocolates, stored in cool dark locations, can last almost indefinitely. I’ve seen freeze dried candies, as well as vacuum sealed mason jars of treats. (PLEASE do not throw out chocolate that has gone white! As a former chef I can tell you that it is NOT mold! It is called bloom and it is the fat in the chocolate separating. You can eat it as is or you can melt it down and mix the fats back in.) For the adults: a small bottle of your favorite liquor might be more to your taste. Or add a case of your family’s favorite soda to help ease the transition.
Above all else, never give up hope!
Water Ban!
On Tuesday this week, a water main broke at one of the biggest reservoirs serving our area. We were originally on a water restriction that has now been replaced with a ban. Our city still has tap water but a lot of the smaller towns right around us don’t even have that.
According to our local media, our city uses on average 140 million liters of water per day (about 40 million gallons) but yesterday, our city used 200 million liters (about 53 million gallons). People were seen watering their lawns, washing their driveways and running sprinklers for their children.
Most people in my area do not have a water storage and now a lot of grocery stores are low or out of bottled water. We haven’t had a water ban since 1998. We are surrounded by the Great Lakes so who would think you would need it, I guess is what most people think. BUT:
– this past weekend was Victoria Day, a long weekend that has long been the ‘safe point’ to start your gardening in our area. Many people that participated in the water ban now have dead plants because they don’t have a rain barrel or don’t use their grey water.
– the next town over has no tap water so no showers, no drinking water, no dishwasher and so on. Do you have enough water stored for at least three days of drinking, watering your veggie garden and giving to your pets?
The weather was 30°C (86 F ) yesterday and muggy, I can understand people want to cool down. Here’s a few ideas (based on what I saw in my neighborhood and on social media) for water conservation.
Instead of filling the pool or running the sprinkler for the kids, give them a popsicle, they’ll love you for it!
Stay indoors between the hours of 11-3 when the sun is at its hottest.
As a lesser evil, turn on your air conditioning unit rather than leaving water running.
Take a shorter shower (or use the dry shampoo recipe I gave a few posts ago)
Use paper plates or eat out of the pots that you cook in.
When you shower, leave the plug in and collect the water for use in your garden (grey water)
Buy (or make) a rain barrel (this one is similar to the one I own)
Don’t water your lawn, it will make it grow and then you have to cut it!
Moral of the story: you should probably have some cases of bottled water put aside for drinking and a rain barrel or grey water system (or both!) for your veggies.
Dehydrating Onions
Onions are such a versatile vegetable. They are cheap and add so much flavor, just about any savory recipe is better when onions are added. Dehydrating onions is quick and easy.
Begin by chopping your onions to the desired size. I usually do large flakes so the pieces don’t fall through the holes on my dehydrator but you could always mince them. Try to remove the thin pieces of skin that clings between the layers. (You can get a dehydrator like mine here)
Dunk your onion pieces into boiling water for about 30 seconds to a minute. They will turn slightly translucent when they are ready and they will be softer. Put them in a strainer and run cold water over them to stop the cooking process.
Pat the pieces dry with some paper towel and remove any extra bits of the skin (which will now be mushy and easy to remove). Arrange the pieces in a single layer on your dehydrator and turn it on.
My dehydrator doesn’t have a temperature control so I just let it run for about 5 hours to have the onions as dry as I need them. They end up paper thin. Recommended temperature for dehydrating vegetables is 135°. I recommend dehydrating these outdoors unless you want your house smelling like an onion factory.
Now here’s a recipe you can use your onions for:
Dry Onion Soup Mix
1 cup dehydrated onion flakes
1/3 c bouillon
1/4 tsp sugar
1 tsp parsley
Store the ingredients in an airtight jar until ready for use. I also like to throw in some other dehydrated veggies (carrots, garlic, celery and whatever else catches your fancy.) To make into soup, add 4 c of water, or for dip, add to a tub of sour cream.

Hair in Emergencies
I’d like to thank Sandy for pointing out the hair aspect of a SHTF scenario.
Personally, I plan to either cut my hair very short or shave it to cut down on the possibility of lice, fleas and other parasites that might like to live in it. This might not appeal to you and then, if you do it, what happens when your hair grows back?
Well, you can keep it short or you can try and keep it clean. I have bottles of shampoo put aside just in case but I also keep small sample size bottles in our bug out bags. I can use them or there is always the potential for barter or just giving away to those that might be in need.
An easy way to keep your hair clean (well, cleanER) is to use a dry shampoo. This is great for conserving your precious water supplies as well.
To use a dry or waterless shampoo, put the powder in your hair, let it sit a few minutes and then brush it out.
A simple recipe is just using corn starch or baby powder (I’ve also used arrowroot powder) mixed with a few drops of essential oils – citrus is good for absorbing oils, tea tree is good for deterring bugs and lavender is anti-septic and anti-bacterial.
You can also keep a few hairbrushes and hair ties in your preparations as well as some razors if you decide to shave your head or to barter with.
