Author Archives: S

Dehydrating Turnip
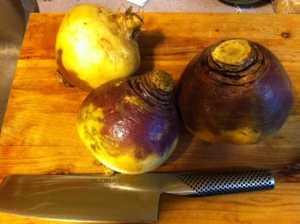
Turnips, along with most other root vegetables, are fairly cheap and easy to dehydrate. This time of year, they are very easy to find and usually on sale.
Wash and peel your turnips

Slice into thin pieces, the easiest way to do this is to use a mandolin slicer.
You can then blanch them (I don’t blanch my turnips) and then place them on your trays.
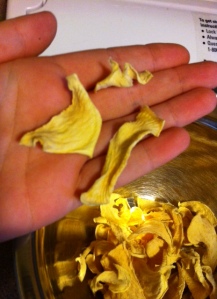
I leave them on overnight at 125 F to make turnip chips. You can eat these as is. They are great with dips as well. Or you can rehydrate them and use them as you would fresh turnips. Try putting the dehydrated pieces in soups and stews.
Prepping Presents for Non-Preppers
We all have people we know that don’t prep, won’t prep, haven’t heard of prepping or you just can’t bring it up.
No worries, here’s some sneaky gifts to prepare them without their knowing.
-flashlights (children especially like these)
-preassembled emergency kits, because you care!
-meals in jars, this is a cheap easy way to make sure they have some food in the house, look for recipes on google (try mixes, soups etc)
-knives or weapons for the manly men out there
-candles… so easy! most women love them and you can decorate a box of matches to go with it!
-books books books!! try food preservation for those who love cooking, homesteading for the gardeners, manuals for crafty people
-gift cards for stores such as bass pro or cabelas
-jars of jams and jellies, be sure to include the recipe so they can make some too!
you can even get them board games, card etc to help with boredom if they were to encounter an emergency.
This obviously is just a short list, but hopefully it will give you some ideas to secretly help your loved ones be a little more prepared.
Car Kits
Its that time of year again and several people are hitting the roads to visit friends and family for the holidays.
While the holidays can be hectic, this is also the time the weather can get nasty. Its no time to forget about emergency preparedness. About two years ago, several cars were stuck on a local highway here for about three days due to the excessive snow. The people were cold, hungry and unfortunately some people did pass away.
I recommend keeping a kit in the car just in case. Some simple items can save your life.

In the kit I have:
basic first aid supplies (gloves, bandages, alcohol swabs, etc)
a wind up radio with extra batteries so I don’t kill the car battery
some easy foods (granola bars, tuna, fruit salad for the kids)
manual can opener
hand warmers (these can be put in your sweater if needed)
a survival blanket (easy, compact way to keep warm, can also be used to signal for help due to shine)
a mini camp stove to cook with (please don’t use inside the car!!)
hand sanitizer (both for hygiene and as a de-icer)
light sticks (comfort item for children, can be used to signal)
book for entertainment
garbage bags (hygiene… when there’s no toilet…. )
a zip bag of cat litter – for a few reasons. Cat litter can help your tires to gain traction if stuck on ice, but I keep my car kit in a cat litter bucket. This is because my car keeps getting broken into and everything gets stolen. No one has stolen my “cat litter”. They did once open the lid and this is what they saw:

a bucket of cat litter… not really worth stealing. But underneath that sneaky cat litter, lays the real prize.

This kit is light weight (about 7 lbs) so can be carried if you have to leave your vehicle.
Some additional things to keep in your car at all times are: basic tools (tire iron, jack and jumper cables and KNOW HOW TO USE THEM!), a case of bottled water (do not eat snow, it will lower your body temperature, let it melt first if you have no water) and a weapon that you are comfortable using.
All that aside, please take your time going where you need to go, don’t drink and drive and be safe!!
One Year Anniversary!
Well folks, its been one year since I started up this blog and I have to say, its been a lot of fun, a lot of headache and a lot of education.
I’m so glad that so many people have found this site and found it useful. I love seeing all the comments that you leave and the emails.
Thank you so much for reading and here’s to another year!
Reusing your own soap
A lot of us have soap in our stocks, its a great thing to have around. In a SHTF situation, hygiene is paramount. Soap is generally cheap, but here’s a way you can save a bit of money.
I personally owned a soap business so I have a lot of soap scraps around but you can do this using the little slivers that are left at the end of the bar.
Grate or break down your soap into smaller pieces and place them in a bowl.

soap scraps in bowl ready for our next step
Put your bowl over a pot of warm water (double boiler). Do not let the water boil, as this gets your soap too hot. If you are using all bar soap (not glycerine soap) you may have to add a little bit of water to your bowl.
Be careful, the bowl and the soap will get hot. Melt the soap down and mix it together. When it is all melted, its time to take it off the heat.
")
Bowl of melted soap
Carefully pour your soap into molds. I have professional molds but this isn’t necessary at all. You can use milk cartons, silicone muffin tins, just about anything. (tip: if you want to make soap for barter or giving away PSHTF, pour your soap into ice cube trays.)
Once your soap is hardened (this can take anywhere from a couple hours to a couple of days), take it out of your mold and cut it into desired shapes and sizes. If you’re having trouble getting the soap out, you can pop it into the freezer for ten minutes and let it get cold, it should come out easily after that.
")
“poc” soap, ready to be wrapped.
It may not be pretty and it may be a blend of a lot of scents, but its soap, its functional and it was free.
To keep your soap for long periods, consider using shrink wrap or putting it into zipper plastic bags. If you used glycerin soap, it may develop a ‘dew’ or ‘sweat’, this is normal and does not affect the function of the soap.
Dehydrating Your Own Milk
Let me just say, this isn’t necessarily a recommended practice, do your research (as always) and decide if its for you.
I recently got 6 litres of milk for $1 each and decided to dehydrate them to make my own powdered milk. Most preppers order their powdered milk in #10 cans from various food suppliers in the US, however this is out of my price range and the tariffs Canadians have to pay on dairy are ridiculous.
To dehydrate my milk, first I had to make parchment paper containers to cover the screens in my Excalibur. I did this by cutting a square and folding up all the edges so they folded over themselves and then I stapled it just to be sure. Put the parchment on your screen and pour a small thin layer of 1% milk onto it. (I used 1% aka non fat milk because the more fat, the more likely it is to go rancid.
I cranked my dehydrator to 135 F and left it over night. About 10 hours later it was ready. The milk turns into a crackly sheet in a sort of yellow color. At this point all you have to do it toss it in a blender or food processor and buzz it up until its a fine powder. Store it in a jar or mylar bag with an oxygen absorber.
To rehydrate, mix it with cold water and shake it until you get all the chunks out.

The Ugly Side of Prepping
Prepping isn’t just about gear, food, water or ammo. It’s not even about knowledge (which of course is vital). You have to be mentally prepared. A lot of people think they are. I’m not so sure of that though.
In New York after Sandy, people were eating out of dumpsters. Gross? Get used to the idea. Even if you’re prepped with years and years of food, it could still happen that you might need to eat garbage. If you accept that possibility now, it won’t be so hard when it comes down to it.
What about self-defense? Most preppers have guns or other various weapons that they would use for self-defense. But most people have never killed someone. It’s a lot more than point a gun and shoot. Could you look someone in the eye and kill them? Can you handle the after effects? Even if you kill in self-defense, there is that lingering guilt. PTSD is not just a soldiers disease and it is not just from being in danger. Taking another human’s life is a big deal and takes a long time to get over. If it comes down to it, you need to be prepared to make that decision and defend yourself and your family. (A good book about this is On Killing, recommended to me by a veteran.)
Sooner or later, you may have to come to terms with the fact that even though you’ve spent hundreds of dollars and thousands of hours prepping, stocking, reading etc, it may not be there when you need it. Sh-t happens. You may have to unexpectedly bug out, leaving your stuff behind, someone may steal it, it may run out. Be sure to have more than one or two plans. You should have plans A through Z.
Bad people will be out there when the SHTF. Good people will turn desperate and do bad things. You need to be able to deal with them and avoid them when you can. Are you ready to loot a store to feed your family? Would you steal for them? Would you kill the guy down the street whose basement is full of MREs? These are things we need to consider. The ugly side of prepping.
Last Minute Preps
So the storm is knocking at our doors and a lot of people have been asking me what they should buy TODAY because they have nothing stored.
Here’s a short list to get you started::
Bottled water – you can also fill your bath tub and any containers in case the water gets shut off or contaminated. You need 4 L per person per day. Don’t forget your animals!!
Easy food – get stuff that doesn’t need to be cooked or requires minimal preparation. Crackers, peanut butter, ready to serve soups. Try and keep away from anything that needs to be refrigerated since we never know if the power is going to go out. Again, don’t forget your pets.
Flashlights – most people have one stuck somewhere in a drawer. Get it out and get extra batteries. Keep in mind candles are not safe if there is a gas leak.
Make sure you have on hand: first aid supplies, warm clothes, basic hygiene needs, books and entertainment (especially those with children).
Tea Tree Oil
Tea Tree oil is a great addition to your preps. The plant is native to Australia and is related to eucalyptus. It has been used for centuries as an antibacterial, anti-fungal and infection healing oil. This is the tea tree oil I buy (tea tree oil)
It can be used on almost any skin ailment including blemishes, wounds, dandruff, head lice, chicken pox and blisters. It is fairly effective at killing Candida, which causes yeast infections.
It has similar healing properties to lavender oil (which I wrote about here).
You can grow your own tea tree plant indoors in containers and potentially distill your own essential oils from it but it requires a significant amount of the plant to make a small amount of oil.
It should not be ingested without supervision of a doctor as it can be toxic internally. Some people are sensitive to tea tree, so make sure you check for allergies before using. A simple skin allergy test is to put a drop or two on the inside of the elbow and wait for at least 24 hours to see if there is a reaction (ie: rash, hives or blisters). If there is no reaction, it may be safe to use it in greater quantities. If there IS a reaction, discontinue use.
Some essential oils are not safe for children, animals or pregnant/nursing women. Do your research!
