Blog Archives
Dehydrating Your Own Milk
Let me just say, this isn’t necessarily a recommended practice, do your research (as always) and decide if its for you.
I recently got 6 litres of milk for $1 each and decided to dehydrate them to make my own powdered milk. Most preppers order their powdered milk in #10 cans from various food suppliers in the US, however this is out of my price range and the tariffs Canadians have to pay on dairy are ridiculous.
To dehydrate my milk, first I had to make parchment paper containers to cover the screens in my Excalibur. I did this by cutting a square and folding up all the edges so they folded over themselves and then I stapled it just to be sure. Put the parchment on your screen and pour a small thin layer of 1% milk onto it. (I used 1% aka non fat milk because the more fat, the more likely it is to go rancid.
I cranked my dehydrator to 135 F and left it over night. About 10 hours later it was ready. The milk turns into a crackly sheet in a sort of yellow color. At this point all you have to do it toss it in a blender or food processor and buzz it up until its a fine powder. Store it in a jar or mylar bag with an oxygen absorber.
To rehydrate, mix it with cold water and shake it until you get all the chunks out.

Tea Tree Oil
Tea Tree oil is a great addition to your preps. The plant is native to Australia and is related to eucalyptus. It has been used for centuries as an antibacterial, anti-fungal and infection healing oil. This is the tea tree oil I buy (tea tree oil)
It can be used on almost any skin ailment including blemishes, wounds, dandruff, head lice, chicken pox and blisters. It is fairly effective at killing Candida, which causes yeast infections.
It has similar healing properties to lavender oil (which I wrote about here).
You can grow your own tea tree plant indoors in containers and potentially distill your own essential oils from it but it requires a significant amount of the plant to make a small amount of oil.
It should not be ingested without supervision of a doctor as it can be toxic internally. Some people are sensitive to tea tree, so make sure you check for allergies before using. A simple skin allergy test is to put a drop or two on the inside of the elbow and wait for at least 24 hours to see if there is a reaction (ie: rash, hives or blisters). If there is no reaction, it may be safe to use it in greater quantities. If there IS a reaction, discontinue use.
Some essential oils are not safe for children, animals or pregnant/nursing women. Do your research!
First Aid Supplies
First aid supplies are essential to any prepper’s stocks. The majority of preppers I know have lots of guns, ammo, food and water but barely any medical supplies. It is essential that you know the basics of first aid so you can take care of yourself and your family should something happen. During an emergency, hospitals are generally flooded with patients in varying degrees of illness and injury. It could take hours before you see a doctor and in the case of a pandemic scenario, one of the most likely places to pick up the disease is, of course, the place where all the sick people are hanging out (but if you truly need medical attention, do not hesitate to get it!)
First, I always recommend that everyone take a first aid and CPR course. These courses are generally offered by the Red Cross and other various organizations for very little money and sometimes free. They usually last a day or two and are worth every penny.
Store bought first aid kits are a great start but I like to customize mine with products I’m familiar with using, as well as rounding out some things I find missing. What you put in your kit of course depends on your medical knowledge.
Next, every household should have a bare minimum first aid kit including the following:
gauze
alcohol swabs
antiseptic
band aids
tape
non-latex gloves
tweezers
scissors
safety pins
thermal blanket (for treating shock)
triangle bandage (or large scrap of fabric)
hand sanitizer
maxi pads (can be used as a bandage)
needles and thread (fishing line or dental floss can be used in a pinch for stitches but please make sure your supplies are sterile)
basic medications (including ibuprofen, acetaminophen, anti-diarrheal, anti-nauseant, anti-emetic, etc)
This is just a basic idea of some of the things you should have around the house. Obviously, there is a lot more you can (and probably should) have but having the training to use these things can be a lot more important than the actual supplies. If you know how to treat the injuries, you can improvise the supplies.
I highly recommend having a First Aid manual on hand (paper copy), here’s an example of one I have at home: https://amzn.to/2xeieYT
Sick Boxes
Its coming up to back to school time and you know what that means. People are going to be sharing their coughs, colds and flus. Even if you don’t have kids, chances are one of your friends does, or the person behind you in line at the grocery store. The coming of fall just brings out all the fun illnesses that we get to deal with every year.
In our house, we like to be prepared for that sort of thing so we have what we call “sick boxes”. A sick box is just a kit of the typical things that you need while you are sick, all in one place, ready for the next time someone is sick without having to run to the drug store while feeling (and looking) miserable.
A typical sick box might include:
chicken soup
tissues
cough candies
cough syrup
anti-nauseant
anti-diarrheal
soda crackers
ginger ale
tea
honey
acetaminophen or ibuprofen
vitamin c/Echinacea or other herbal supplements
And whatever else helps you feel better without having to go get it.
A great advantage to doing up a couple sick boxes is that you can get all the supplies while they are on sale or with coupons and don’t have to pay full price or run out at 3 am when your kids are suddenly sick.
Preserving Corn (While We Can Afford To)
Thanks to the weather conditions all over North America, crops are failing at alarming rates, especially corn. The price of corn has sky rocketed and I can only assume will continue to do so. Corn is of course animal feed but it is also a major ingredient in just about everything we buy today. I went to the farmers market and was asked to buy corn for $5 a dozen (this of course is locally grown but not organic). Later that same week, corn was on sale at the grocery store for $2 for 10 cobs. I grabbed as much of the $2 corn as I could (it also happened to be local).
You can freeze a cob of corn as is. No prep. Don’t shuck it or cook it, just throw it in the freezer (although I usually look for bugs and give it a rinse first). To cook your frozen cobs of corn, you can cook them with the husks on (takes a bit longer) or you can husk them while frozen and just throw the frozen corn in the boiling water just like you would if it was raw. The corn is best if used before 8-12 months in the freezer.
Corn can be canned using a pressure canner. Because it is a low acid food, you cannot properly can corn in a water bath canner. Make sure you use an USDA approved corn canning recipe.
The easiest and most space effective way for me to preserve corn is of course my ever faithful dehydrator (which you can purchase here). To do this, you can cook your corn as if you were going to eat it. Once it is cool to the touch, slice the corn off the cob. Break up the little pieces of corn and spread it out on your dehydrator trays. It takes around 6 hours (or more depending on the humidity in your area) for the corn to dry. I find frozen bagged niblets of corn dehydrate a lot faster (and sometimes nicer) than your own cobs. Once it is dehydrated, you can enjoy it as is for a snack. It is sweet and crunchy (make sure you drink lots of water). You can also grind it into corn meal or corn flour. You can add it, as is, to soup or stews.
I’m personally going to do as much as I can. There has been rumor of the cost of corn going up to $9 a bushel in some areas.
Make sure to store your dehydrated corn in a cool, dry area in a airtight container.

10 cobs of corn fit into one standard sandwich bag when dehydrated
Basic EDC
An EDC, or Every Day Carry, is a kit that you take with you everywhere. It is smaller than a bug out bag and a bit more than most people usually carry. It is a good idea to carry one of these in your backpack, work bag or purse. Do not leave it in your car (I’ll cover car kits another day).
A basic EDC has enough stuff to get you home should you be stranded at work or school. You can think of it as an extended overnight bag if you will, I usually have most of this stuff in my purse. A basic kit might include:
soap
shampoo and conditioner
toothbrush and toothpaste
a can of tuna or other high protein food
a higher carb option (as seen in the picture –ramen noodles)
chocolate or candy
space blanket
a way to start fire
a candle or other heat source
a flashlight or glow stick
tea, coffee or other hot drink
water
a higher sugar and energy content drink (soda or sports drink)
first aid items (the metal tin in my photo contains cotton, ibuprofen and other basic medicines)
Also included (but not seen in the picture) is some money, self-defense tools, a small notebook of basic survival information, basic maps of the city and surroundings, chap stick (which you can use as a fire starter in emergencies) and a book or set of cards in case you get stuck somewhere.

Bug Out Bags 101
A bug out bag is a bag that you keep full of supplies ready to go at a minutes notice in case of an emergency where you leave your home. It is also known as a GOOD bag (Get out of Dodge) or a 72 hour bag. There is a few different types depending on what your plan is. Be sure to use a heavy duty bag with good supports (such as a waist band and thick straps, possibly with metal framing).
A basic bug out bag contains everything you would need to survive for 72 hours away from home or as long as it would take you to get to your retreat spot, including:
Shelter (such as a tent and sleeping bag, making sure to buy weather appropriate)
Food (usually light weight such as dehydrated or freeze-dried and a way to cook said food ie: pot, mini camp stove or fire making implements)
Water or a way to purify water (here’s a handy mini filter I keep in my purse)
First aid requirements (bandages, alcohol swabs, gloves, gauze etc)
Any medications you or your family requires
Small amount of cash
Hygiene needs (toothbrush, toothpaste, comb, shampoo, fem care etc)
Self defense
It’s also a good idea to have a survival manual of some sort and a copy of any important documents (birth certificates, deeds etc which you can scan and put on a thumb drive)
Many people carry an EDC (everyday carry bag) which includes a lot of the stuff already mentioned but it is said in the prepper/survival universe: “two is one, one is none.” or as I say “rather too much than too little”. Your bug out bag should be as individual as you are. No one can tell you exactly what to put in your bag because we don’t know where you are or where you are going. I do recommend the above list as a starting point and that every family member have their own bag in case someone gets separated from the group. It is a good idea to keep your bug out bag readily accessible (in the front hall closet etc) so you always know where it is. Keep in mind this is a very basic list to get you started on thinking about what you might need. Just remember, you will have to carry this at least part of the time so make sure it doesn’t weigh you down so much that you can’t function. A good exercise is to strap on your bug out bag and go for a hike, see how far you can make it with the weight and adjust as necessary.

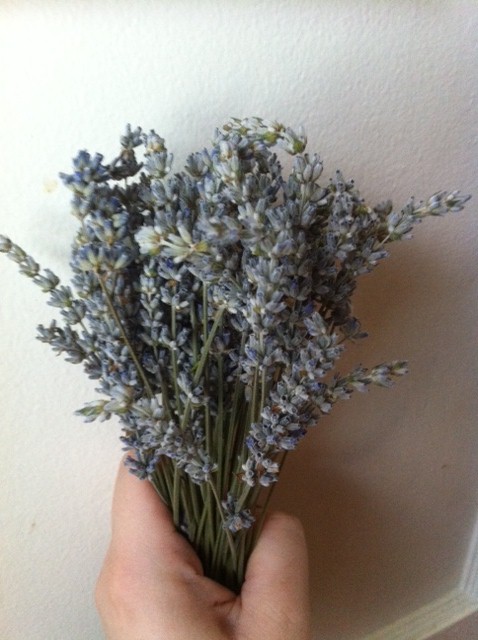
Lavender Essential Oil, a Prepper’s best friend
Lavender essential oil is indispensable to a prepper.
You can use lavender oil on just about any skin irritation. Burns, scalds, rashes, bug bites (especially spider and mosquitoes I find), cuts, acne, seriously just about anything. All you do is put the lavender oil straight on the area of irritation, you don’t have to mix it with anything and you just need a tiny drop to cover a good area. It doesn’t sting like some modern medicines, it soothes and reduces scarring. In a household with a chef and kids, we use it a lot and don’t have nearly as many scars as we should!
It can also be used as a bug repellent, an antiseptic, an antidepressant. The scent is used in aromatherapy to relax and calm the client. It makes a good treatment for head lice, sunburns, helps to treat clinical shock and muscle pain.
Its edible and can be used in cooking (although I usually stick to using it in desserts, it apparently goes well with rice or fish).
Basically this is a natural wonder drug that is so much cheaper than buying all the separate medications needed to treat the above issues. If you had enough of the flowers you can make your own essential oil (you’d need a distiller, I’ll blog about that another day). Here is some lavender oil, (make sure you get undiluted). So let’s hear it for lavender!!
Home Made MRE’s
Have you ever opened an MRE (Military ration) and thought half the stuff was gross? Or been allergic to some of it? What about people with gluten allergies or dairy allergies? That stuff is loaded with wheat, soy and milk products. And honestly, a lot of people are just plain picky.
So I made my own MRE. I took apart some of my MRE’s that I got through the army and also searched through my cupboards. Here’s my example:
Freeze dried Chili Mac (made by Wise Company – thanks to TF for sending it!!)
Instant Vegetable Couscous (from a MRE you can make your own, just throw couscous in a bag)
Tomato Basil Rice (from a MRE but you can make your own)
Vegetable Beef Cup of Soup (grocery store)
Bread (from MRE – limited shelf life but I have seen people use vacuum packed tortillas)
Orange sport drink powder (from a MRE but you can get individual sizes at grocery stores)
Peanut Butter and Jam (from MRE but can get from restaurants, also on amazon etc)
Oatmeal (grocery store)
LaraBar energy bar (available here)
Salt, pepper, tea and sugar (available at almost any restaurant… well, buy your own individually wrapped tea bags)
Once you have everything you want, throw it in a bag and vacuum seal it. Or put it in a Ziploc and use a straw to suck out the extra air. I’ve seen people do their own MRE’s with ramen noodles and dehydrated vegetables, macaroni and cheese (out of the box), packets of tuna, soup mixes, anything really. It is easy to go to the grocery store and buy shelf stable items. Just pick something you like and that you’ll eat and throw it all together! Later on, I’ll give you some ideas for the little ones in your survival group

